


Introduction Have you ever struggled with Google's unsafe warning for your website? This warning actually affects your website's reputation, significantly reduces traffic, hampers the trust of users, and ultimately affects
Introduction
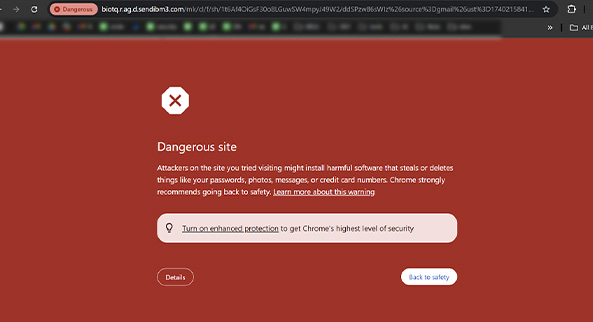
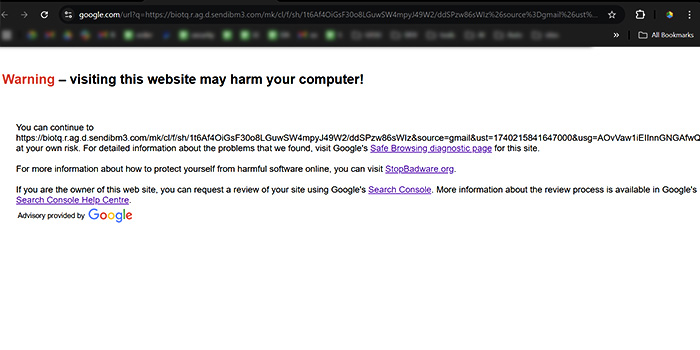
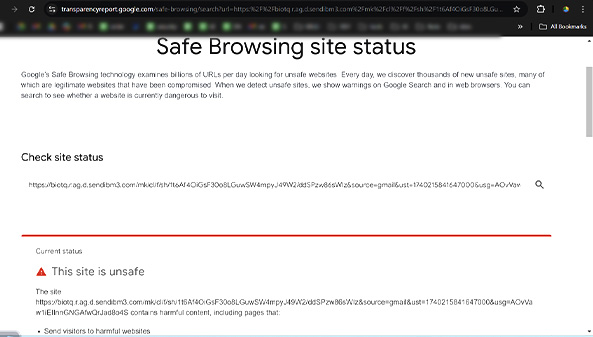
Have you ever struggled with Google's unsafe warning for your website? This warning actually affects your website's reputation, significantly reduces traffic, hampers the trust of users, and ultimately affects your business's success. Whenever any website user encounters this alarming red warning page that says, “This site has harmful content”, they will definitely navigate away, which will lead to a loss of opportunity and hamper the business.
This guide will walk you through understanding why these warnings appear, how to identify specific issues, and, most importantly, the step-by-step process to resolve them properly.
Understanding Google's Security Warnings
Google displays different warning types depending on the detected issue:
- “Malware Incoming!” → Your website has been compromised with harmful code (digital infections).
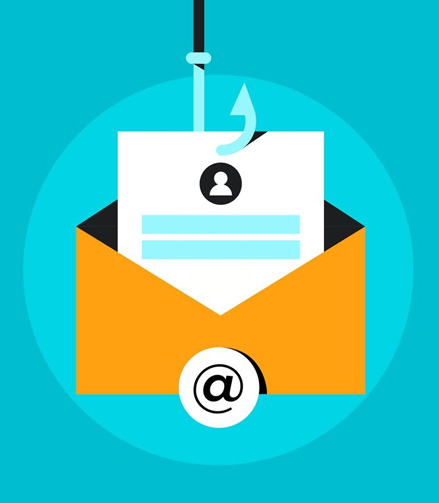
- “Phishing Warning!” → Your site could be deceiving visitors into providing sensitive information like passwords or credit card details.
- “Unwanted Software!” → This is akin to your site inadvertently distributing dubious freebies (dangerous downloads).
- “Social Engineering!” → Your content may be misleading people (for example, fake pop-ups claiming “Your computer is infected!”).
Why Your Website Might Be Flagged
Google may flag your website for several reasons:
- Digital Infections: Hackers have inserted malware into your website’s code (similar to a sneaky roommate leaving spoiled food in the fridge).
- Outdated Software: Your CMS (like WordPress), plugins, or themes are outdated and riddled with security vulnerabilities—favorite entry points for hackers.
- SEO Spam: Hidden links or nonsensical text inserted into your site to manipulate Google’s rankings.
- False Alarm: Occasionally, Google makes mistakes. (Yes, it happens!)
Step-by-Step Process to Remove Google's Unsafe Website Warnings
Step 1: Verify the Warning in Google Search Console
- Log in to Google Search Console
- Confirm the Alert Access Google Search Console
- Under “Security Issues,” you’ll find detailed information.
- Is it malware? Phishing? Take manual steps to solve the issue.
Step 2: Backup Your Website
Before making any changes:
- Create a complete backup of your website files
- Export a copy of your database
- Document your current configuration settings
Step 3: Scan and Clean Your Website
Using Google's Resources:
- Review the specific issues reported in Search Console
- Follow Google's recommended steps for your particular warning type
Using Security Tools:
- Run a comprehensive malware scan using tools like Sucuri SiteCheck, MalCare, or Wordfence (for WordPress)
- Check server logs for suspicious activity
- Scan all files for unauthorized changes
- Review your .htaccess file for malicious redirects
Manual Inspection:
- Look for unfamiliar or obfuscated code (often containing eval, base64_decode, or heavily encoded strings)
- Check for unauthorized admin users
- Review recently modified files (especially core system files)
- Inspect for hidden iframes or JavaScript injections
Step 4: Remove Malicious Content
- Remove any identified malicious files or code
- Clean database tables of spam content
- Delete unauthorized users and backdoors
- Reset all passwords (admin, FTP, hosting control panel, database)
- Update all software to the latest secure versions:
- Content Management System (WordPress, Joomla, etc.)
- Themes and templates
- Plugins and extensions
- Server software
Step 5: Implement Security Measures
Prevent future infections by:
- Installing security plugins/software
- Implementing strong password policies
- Setting up two-factor authentication
- Configuring proper file permissions
- Enabling a website firewall
- Establishing regular backup procedures
- Creating a security monitoring protocol
Step 6: Request Google Review
After cleaning your site:
- Return to Google Search Console
- Navigate to Security Issues or Manual Actions
- Select "Request Review"
- Provide detailed information about:
- The specific issues you found
- The steps you took to resolve them
- The preventative measures implemented
- Submit your request
Google typically reviews requests within 1-3 days, though it can sometimes take longer.
https://www.google.com/url?q=https://biotq.r.ag.d.sendibm3.com/mk/cl/f/sh/1t6Af4OiGsF30o8LGuwSW4mpyJ49W2/ddSPzw86sWIz%26source%3Dgmail%26ust%3D1740215841647000%26usg%3DAOvVaw1iEIInnGNGAfwQrJad8o4S&source=gmail&ust=1740277641945000&usg=AOvVaw04NigMTdxfYWXMPdPSjd6OWhat to Expect After Submission
- Review Process: Google will recheck your website for the previously identified issues
- Temporary Status: The warnings will remain active during the review period
- Notification: You'll receive an email when the review is complete
- Follow-up: If issues remain, you'll need to repeat the cleaning process
Long-term Benefits:
- Improved Security Posture: The cleaning process often reveals and fixes vulnerabilities
- Enhanced Website Performance: Removing malicious code frequently improves loading speeds
- Better User Experience: Clean sites function as intended without unwanted redirects or popups
- Protection of Brand Reputation: Demonstrating commitment to security builds confidence
Conclusion
Addressing Google's alerts regarding unsafe websites necessitates a comprehensive evaluation, meticulous cleaning, and the establishment of appropriate security protocols. Although the procedure may appear daunting, adhering to these methodical steps will aid in reinstating your site's trustworthiness with both Google and its users.
By implementing these measures, you are not merely addressing a warning; you are laying a more secure foundation for the future of your website.
Respond to this article with emojis